Posts Tagged ‘wax’

Products of the hive – cleaning and using bees wax


IMG_0613

Having previously written about both honey and the use of bee venom I thought it would be good to mention another product of the hive and share a bit of what I do with the wax that I accumulate from the hives. Having kept bees for several years I have ended up with quite a lot of wax from old brood frames and honey supers, cell cappings removed during the honey extraction and all those scrapings and bits of brace comb that the bees seem to build whenever they spot a little bit of space accidentally left in the hive by the careless beekeeper. The colour of the wax varies from near white cappings on the fresh honey combs to dark brown, heavily ‘propolised’, wax in the brood frames that are just a few years old.

Using the uncapping fork

clean wax cappings being removed from cells during honey extraction

Comb is quite bulky to store and often contains other bits and pieces from the hives so I initially melt this down to reduce the size and start the cleaning process. I use a large pan with about 2″ of water from the garden rain butt, bring it to the boil then reduce to a simmer and add my wax lumps. Bees wax has a relatively low melting point of around 62 – 64 degrees centigrade so this doesn’t take long and as it reduces the bulk, I can often get a large bucket of comb melted down in a single saucepan. I then leave this outside to cool over a couple of days, the wax ‘shrinks’ away from the sides of the pan so it is easy to remove and all the non-wax components sink to the base giving a layer of ‘crud’ which can easily be removed with a large knife and disposed of. This then leaves me with a round ‘cake’ of wax that I can store somewhere dry until I am ready to use it.

These wax cakes are then broken up using a large wooden mallet and melted down a second time in fresh rain water, I then pass the wax through a muslin cloth. To make this easier I cut a square of cloth to fit over a plastic plant pot that I have removed the base from, I attach the cloth with an elastic band to make a filter that is easy to use when I also have a large pan of hot wax to juggle. The wax is poured through this filter into containers that act as ‘moulds’ and again allowed to cool slowly. I now have wax that I consider to be clean enough for use in candle making.

A wax 'cake' that has been filtered through a muslin cloth filter

A clean wax ‘cake’ that has been filtered through a muslin cloth filter

In the past I have made tapered candles through ‘dipping’ wicks repeatedly into hot vats of wax but although great fun this is a very slow process,  traditionally families would have got together to share a meal with all the generations helping out with this task. For the purpose of this blog though I am looking at using a candle mould to make some small candles.

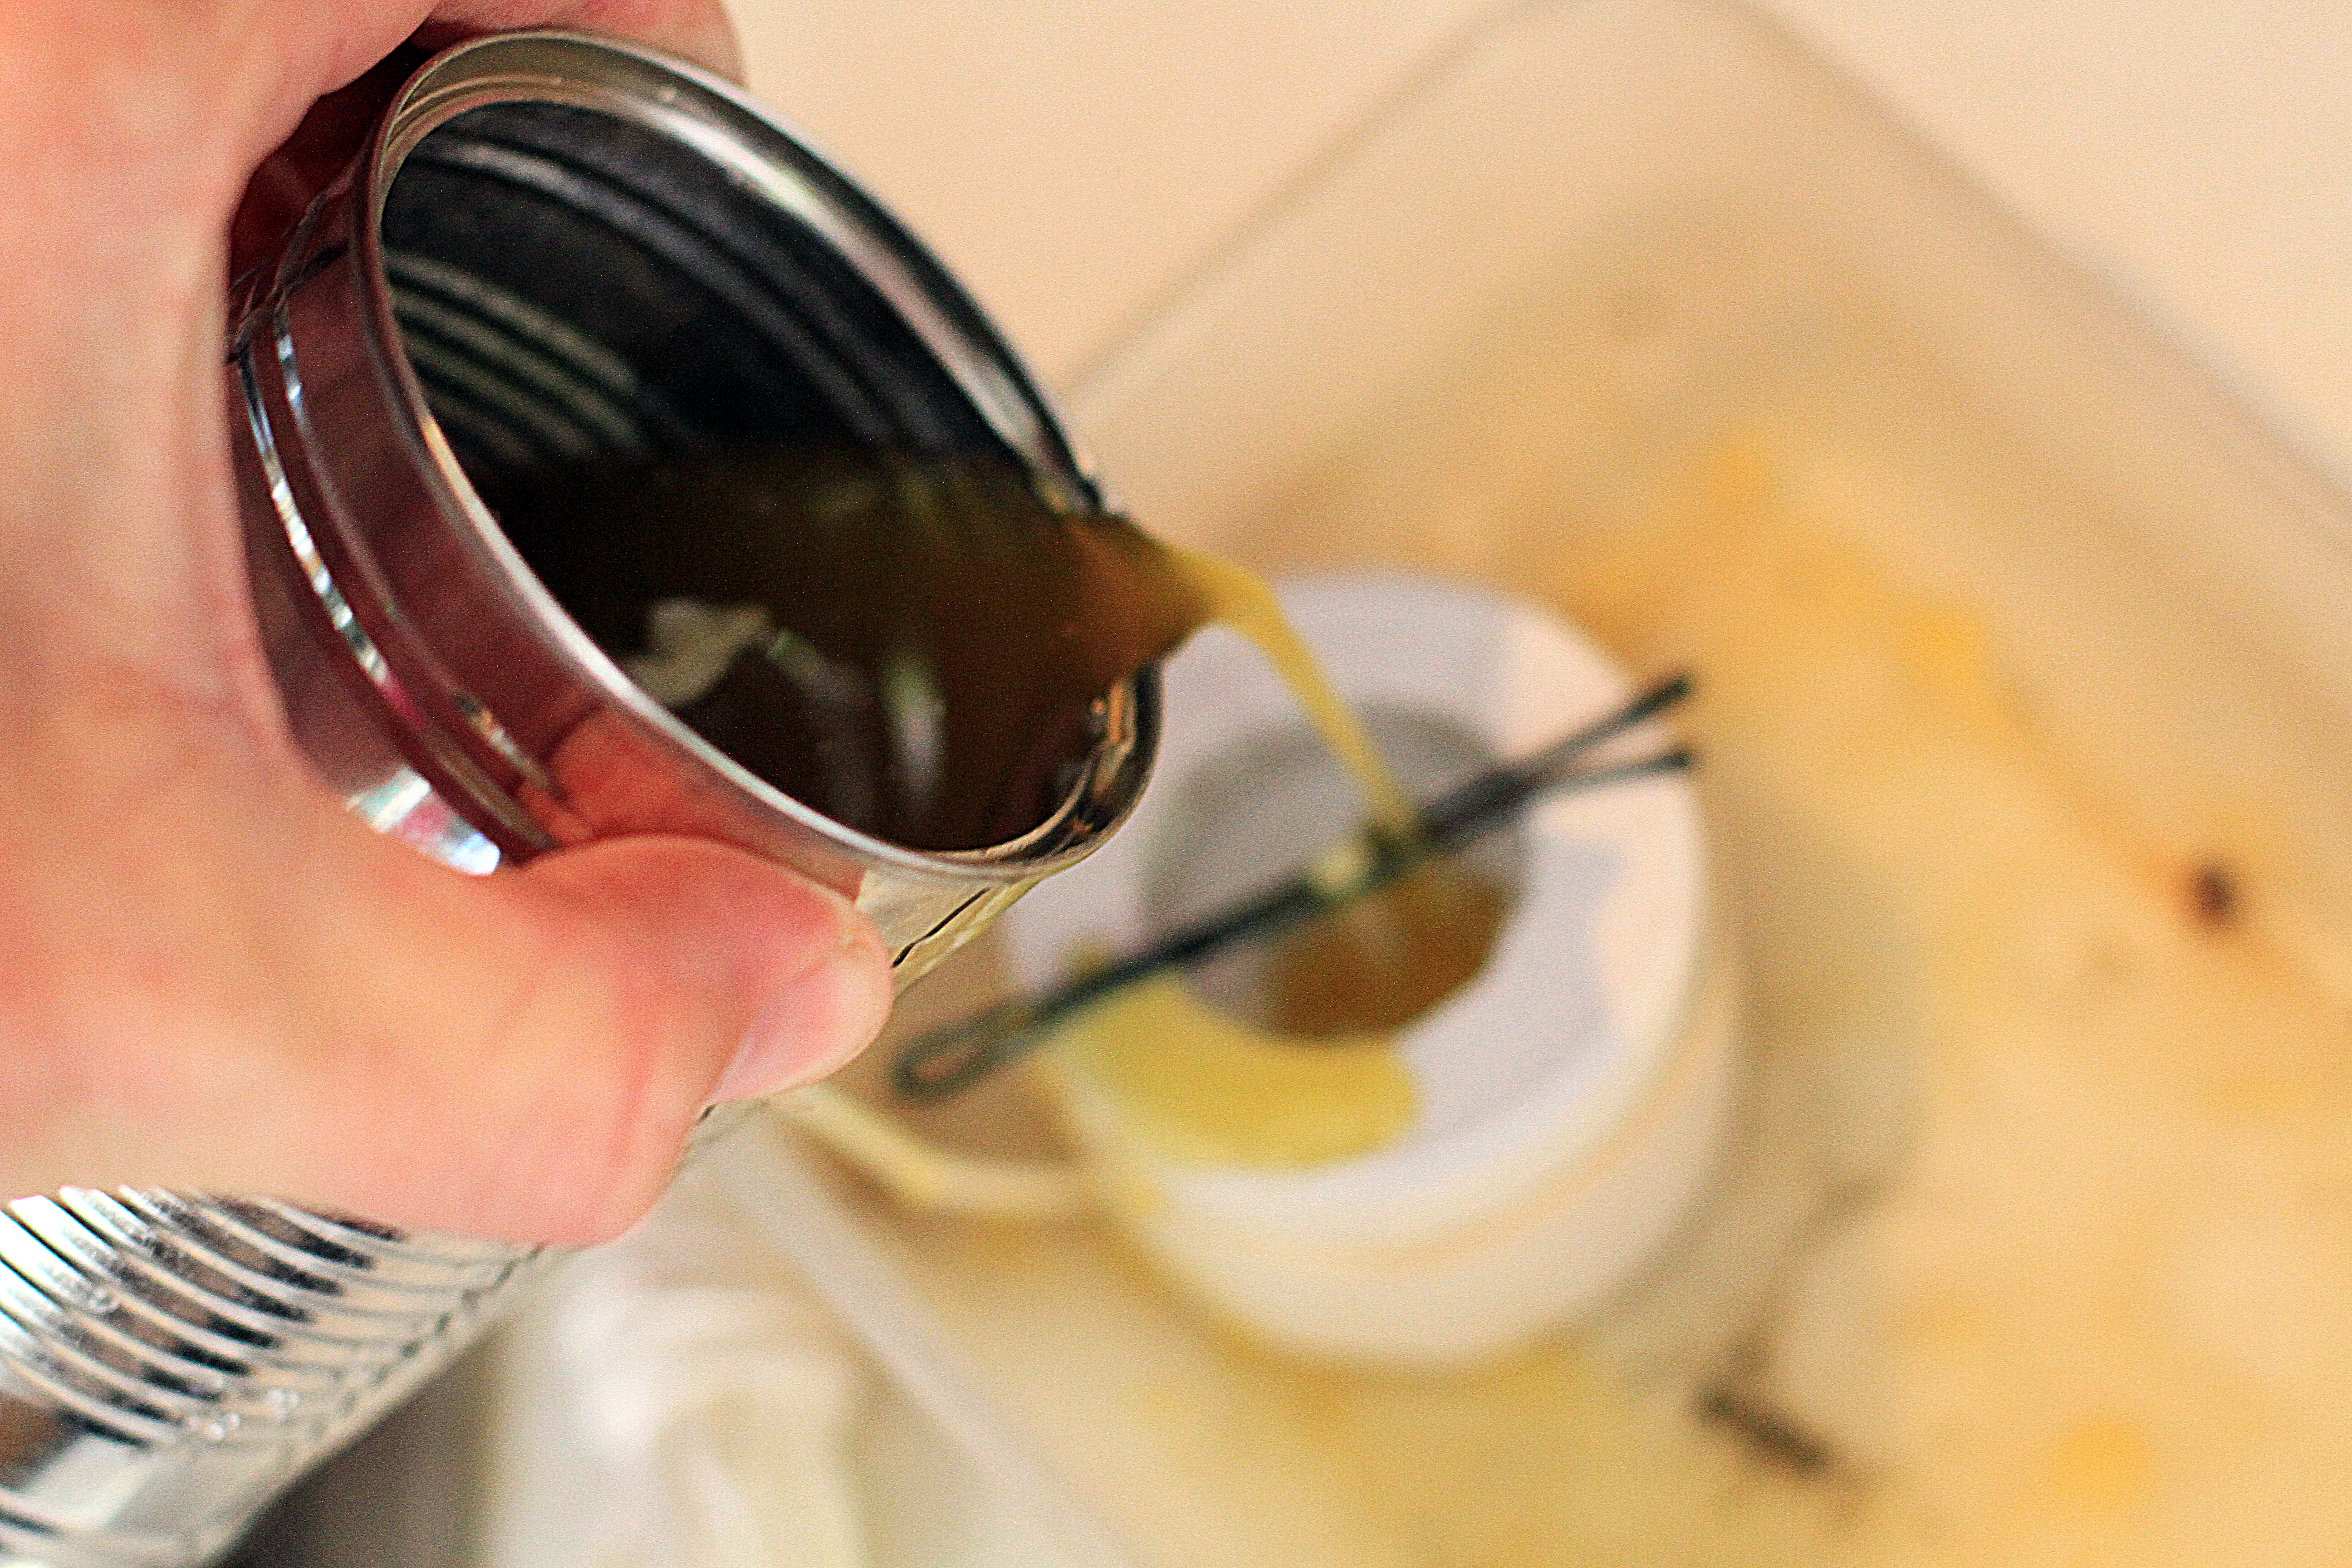
Wax is best heated using a double boiler, you can buy all sorts of devices for this purpose but to be honest if you are only using small amounts a recycled tin can in a pan of boiling water works very well. I use needle nose pliers to flatten the ‘lip’ and create a pouring spout to control the wax and reduce wastage (and cleaning up afterwards).

I have also seen YouTube videos where wax is melted in a microwave in a pyrex jug and guess this works very well if you have an old microwave and jug that you don’t mind using.

Melting wax in a 'double boiler' using a recycled can and pan of hot water

Melting wax in a ‘double boiler’ using a recycled can and pan of hot water

The silicon mould that I am using was purchased from Thornes beekeeping suppliers, although you can buy moulds from other bee suppliers, online from specialist candle making websites and very cheaply on eBay from China. You initially need to cut a partial slit down each side of the mould to ease the removal of the candle when made, then fix elastic bands around the mould to hold it back together again, feed the wick through the base (I use a skewer for this) then attach something to hold the wick in place – a hairpin is perfect for this.

Mould prepared for candle making

Mould prepared for candle making with wick fed from the base

Once the wax in the double boiler has melted it is simply a case of carefully filling the mould to the top and leaving it to set, for these small bee light candles it only took around 15 – 20 minutes to set enough for removal but obviously larger candles will take significantly longer.

Pouring the molten wax into the mould (slight spillage as poured left handed whilst using the camera)

Pouring the molten wax into the mould (slight spillage as poured left handed whilst using the camera)

Once the candle has had time to set and been carefully removed from the mould you simply cut the wick and re-attach the hairpin ready for the next candle to be made.

We take so much for granted these days and it is cheap and easy to buy a packet of paraffin wax tea lights but these will not have had the journey from bees to hive, then cleaned and moulded into shape. There is no real value to selling them as a product as the price would never reflect the time or effort of the beekeeper in producing individual  candles but there is a certain pride with putting them out as homemade when friends come round for dinner.

IMG_0612

There are of course many other uses for bees wax, from cosmetics through to cleaning products, so I would be interested to hear from other beekeepers as to how you use your wax.

I hope to keep adding to this blog as and when time allows in 2014, thank you for taking the time to read my ramblings your continuing comments and questions – this makes it all worth while for me as the writer….

I can also be found at @danieljmarsh on twitter or British Beekeepers page on Facebook.

Dan

August arrives but still no joy for the bees….


What a wet year this has been …. July was again dominated by low pressure fronts bringing in cloud and wet conditions for the first three weeks then it was unseasonably hot but this only lasted for a few days before the unsettled weather returned. The bees have been unable to fly on many days and even though many plants have been late to flower this year the bees just seem to be playing catch up all the time.

By the beginning of August last year I had three full honey supers on two of my hives and two on the other, full of delicious golden honey ready to extract but then the bees took advantage of the exceptionally warm and dry spring, this year I have about 1 1/2 supers to extract and even that has not been fully capped yet and it is still ‘loose’ so is unlikely to be reduced enough yet to prevent it fermenting in the jar – I have decided to leave it on for a bit longer to see if the current warm weather and late flowering brings a late crop or if the bees decides to take the honey down for winter stores, then that is also fine.

Hive inspection

Hive inspection before removing this years honey

I started this beekeeping year with 3 strong colonies, I have lost queens, added new queens, lost swarms only to catch and rehouse them – at one point there were 5 hives on the go but now I am back down to four with one being queen-less and with so few bees (about 3 frames) that I am letting them go rather than merging them this late in the year and risk damage to a laying queen preparing for winter so I will enter winter once again with three very strong colonies and all with healthy fertile 2012 queens.

Fanning bee

Bee fanning at the hive entrance to help regulate the temperature for brood rearing and honey reduction

Having started this blog entry at the beginning of August I have waited until slightly better weather in mid-August before I decided to extract the honey. I attended the apiary on Saturday morning (the hottest day of the year so far) to shake the bees out of the honey supers as best as I could and place the clearer boards with bee escapes in over an eke (‘spacer’ box) above the hive. The idea of adding an empty eke or super under the clearer boards is that it allows a bit more space and prevents congestion as the bees leave the honey super through the bee escapes, which in turn do not allow them to return.

Uncapped honey

Uncapped ‘ripe honey’ being worked in the hive


The theory is that in 24 hours your honey supers are clear of bees and ready for you to carry off unnoticed… of course the reality each year is that the the supers still have bees in them that need brushing and shaking off . I do this frame by frame, placing the clear frames of honey in a super over an upturned roof with a towel over the top to keep the bees out. This year there was an added complication of lots and lots of wasps in the apiary, as soon as I lifted the honey super off wasps were carrying the dead bees from the crown board off to feed their young, guess that’s nature and it saves them going to waste but angry wasps flying around your head is very off putting even to a beekeeper!

Frame of capped honey

Frame of honey before extraction


The honey frames are removed to a wasp and bee free space and uncapped, literally cut open, to allow the honey to flow out and then placed into a centrifugal extractor when they are spun at high speed to allow the honey to fly out, hit the sides and drain to the base of the drum.


Once the frames are all emptied into the base of the extractor the honey is run through a coarse, then finer filter, to remove any larger pieces of pollen and wax, these won’t effect the quality of the honey, indeed they add much to it’s aromatics, texture and beneficial qualities that have been removed from highly processed supermarket honey to give it a longer shelf life as runny honey.

Uncapping fork

Using the uncapping fork
to ‘open’ the honey cells


As soon as the honey has been removed it is time to feed the bees with a heavy sugar syrup to make sure that the removal of the honey has not depleted their food stores so much that they would not survive the winter.

I always leave my bees in a ‘brood and a half’, over the winter months, effectively I leave an additional super on as this allows them to have a greater level stores in the hive to try and prevent them from starving and also gives the space for the queen to lay up a large brood early next year when they are fed a weaker syrup to give them a boost in the spring.

The bees also start their treatment to combat the Varroa Destructor, a parasitic mite that are present in virtually every UK hive these days.

Coarse honey sieve

Sieving the honey for coarse bits of pollen and wax

Once the honey has been filtered it is allowed to sit in a settling tank for at least 24 hours so that any air bubbles introduced into the honey during the rapid spinning at extraction escape, again this is purely for aesthetics – it wont affect the quality of the honey but people seem to think it looks much nicer without them. Finally the honey is run off into freshly sterilised jars and the labels are attached ready for sale, or in the case of a lower crop like this year, ready for eating and making more mead!

There are many European rules and regulations relating to the labelling of foods, including honey, and these can be found at the ‘Foods Standards Agency’ website by clicking here, but if you don’t have time to read all 23 pages there is a quick summary at the bees-online webpage here.

I hope you have enjoyed reading the blog,  feel free to contact me with comments, suggestions or general feedback, click on the right column to subscribe and receive updates when I next have the time between chasing the bees to write again.

I can also be found at @danieljmarsh on twitter or British Beekeepers page on Facebook.

Dan

N.B. clicking on the images opens a higher resolution image in a new window.

Spa Valley Honey

Spa Valley Honey